
So the pull of Nostalgia was strong this month…
After getting MaG3 updated and trying to get Master Tracks Pro running on it I knew I had two choices – either brute force the bugs and foibles of getting it to work on a PowerPC (the G3 iBook) or get a system that was designed to actually run it. Of course I chose the latter.
And that’s where I met Wayne – more on him shortly. To make this happen, I would need a 68k (Motorola 68000-era Mac) machine similar to what the software ran on back in the day. I started using MTP on a Mac Plus in the mid-80’s and was still using it on my Mac IIx when I moved to the Sunburn State® in the early 90’s. We were up to Version 5 at Eighth Dimension (I believe on a Motorola Mac Clone) before switching to the more powerful audio sequencers that were coming out and the more powerful computers that came along with them. There are plenty of possible machines to choose from that fit this profile, but as ‘Vintage Computers’ are a hot commodity these days, the smart bet is to find something in the ‘not so desired’ category…
The main problem with older Macs is they will need a hefty amount of repair work to get them to work in the modern age. Capacitors that are either out of spec or have leaked (causing damage), Backup batteries that have most likely leaked (causing even worse damage), and power supplies that might catch fire if you try to plug them in. Compact Macs (like the Plus or SE) also have integrated monitors that can be so well-used that they are dim, or blank, or have become unusable due to air leaks, and they also have their own circuit boards needed to drive the multi-thousand volts of power needed to make them go that might also catch fire if not fixed… So a Plus, SE, or the coveted SE/30 might not be the wisest choice, although really cool to have around. I’d have to find something in the generations that proceeded those to make a better choice.
There is a growing community of tech geeks who have made it their hobby to collect, refurbish, and utilize these older machines. Adrian Black on The Tube of Yous does excellent tech content on Macintoshes, Amigas, Commodores, and even PC’s. Fascinating stuff, and his attention to troubleshooting, repair, and explanation is (IMO) the best I’ve found there. There is also Mac84, and the geeky goodness of Tech Tangents for the more esoteric info on classic machines and software. Oh, and don’t forget Action Retro if you want to see older computers pushed to the extreme and Linux tested on everything because…Linux.
But these kids are pros at this. I have some electronics knowledge and capability but up over the years, but I liken it to ‘just enough to be dangerous’ and after watching several videos on refurbishing classic Macintoshes I knew what my skill level could manage and also what it would cost (both money and time) to make this project a success. What I really needed was a guru to help navigate this minefield, and I found that in a certain Wayne Bibbens.
While trawling through eBay listings trying to find something that was in the ballpark of what I wanted, was affordable, and in my wheelhouse of knowledge to repair, I found Wayne’s Shop. In short, Wayne has been fixing and selling computers (highly focused on the Apple side) for decades. His old retail site is still on the Interwebz® if you want to cry over the prices these machines sold for only a few years back.
The long(er) version is Wayne is one of those people eBay Buyers dream about – knows his stuff, answers questions handily, has reasonable prices, and (at least on his eBay Store) personally fixes and upgrades the machines he sells. There’s a lot of other bits and bobs there too if you’re interested – akin to an old antique mall where there’s still someone in the back repairing the watches being sold in the front case. He’s just a cool person to talk with (and we have had a lot of email conversation back and forth) and I’ll say certainly the best Seller I’ve used on the site. As they say, ‘Highly Recommended’. 🙂
Wayne used to be an engineer for a major industrial company, which would explain his skills with fixing things, but is also a guitarist, has started his own music site for selling tracks of artists who would be lost in the shuffle of the Streamers (based on the same URL used for his own Internet Service Provider company back in the day), and was at one time a Professional Bowler. I really want to interview Wayne for this blog as he’s one of those ‘many hats’ people I find incredibly fascinating.
Anywho, that’s where I found Lucy.
Lucy (yeah, I’ve given up on the ‘Ford Family’ names) is an early 90’s Mac LC sporting a 68020 processor, 10MB (yes, Megabytes) of RAM, a floppy disk drive, and a solid-state storage system. Wayne has recapped (replaced the capacitors) on both the Motherboard and Power Supply, checked the other components for spec, cleaned and repaired the floppy drive, and added a BlueSCSI internal card to replace the spinning Hard Disk. It was exactly what I wanted, and at a price that meant I could get a perfectly usable machine up and running quickly with minimal muss and fuss. And I wouldn’t mess anything up by trying to repair it myself…
The original LC is what many call a ‘compromised system‘. 32-bit processor hobbled by a 16-bit Data Bus, limited RAM, and a short list of viable Operating Systems. But since I really only wanted to run Master Tracks Pro and a few other older music programs, it would be more than usable for what I need. It also has a small footprint (think of it as the Mac mini of it’s time), has VGA video capability for the external monitor (more on this in a bit), and is easy to get into if I needed to fix something. The addition of the BlueSCSI was something I was looking into as an add-on, since it’s perfect for both running the system and software without the headaches of maintaining an old SCSI hard drive. In their day we used SCSI drives constantly, but they are not made anymore and after 30+ years of use for many of them, finding one that works perfectly is going to be an exercise in futility. Wayne’s build took the LC to the max and even eliminated the remaining flaw.
One thing I would have to address is that the LC uses both the Mini-8 DIN plugs for the serial connections (Printer and Modem) and the Apple Desktop Bus (ADB) for connecting a keyboard and mouse. This would mean I need to find a serial MIDI Interface as well as Apple ADB-based input devices… The MIDI interfaces are all but obsolete (read; cheap) and indeed I found a simple 1-In/3-out on the ‘Bay for like five bucks. However, the prices of ADB keyboards and mice are absolutely off the chain on the online sites (even Wayne knows the value here as his are not as pricy, but there still that supply and demand thing happening here)… Fortunately, there are some other clever tinkers to the rescue than just adding SCSI adaptability. The crew over at Big Mess o’ Wires makes something called the ADB-USB Wombat that will take pretty much any USB keyboard and mouse and convert it to ADB (you can also do the opposite if you prefer) so I grabbed one and an ADB cable from them and dig into The Closet of Wonders® to find suitable keyboards and mice.
Wayne was nice enough to toss in a DB-15 to VGA converter for the monitor (older Macs use a proprietary video connector although VGA capable) and a Mini-8 Din cable for the Interface (it didn’t include one), and I managed to find an old Princeton 15″ LCD monitor on the cheap that only supported VGA, and a bit research on the ‘Net showed had the ability to support Mac resolutions as well – thanks Manuals Library! I did find an old 19″ HP monitor in the junk pile at my office, but the specs seemed like it might be ‘too new’ to deal with the LC’s video needs so I left it for a backup. With everything ordered, I waited for the boxes to arrive…
Most everything arrived a few days later – except the Wombat. I could still fire up the machine without a keyboard or mouse, but I couldn’t check much more than that. Upon arrival, I noticed some rattling in both the computer and monitor. Not a good sign… The backup (PRAM) battery had come out of its holder in the LC and a thorough check showed no signs of damage. I snapped a pic and emailed it to Wayne to double-check for anything I didn’t see – he said it looks good, and to leave the ‘hood’ off the computer to check the lights on the BlueSCSI to make sure it was functioning once I got things up and running.
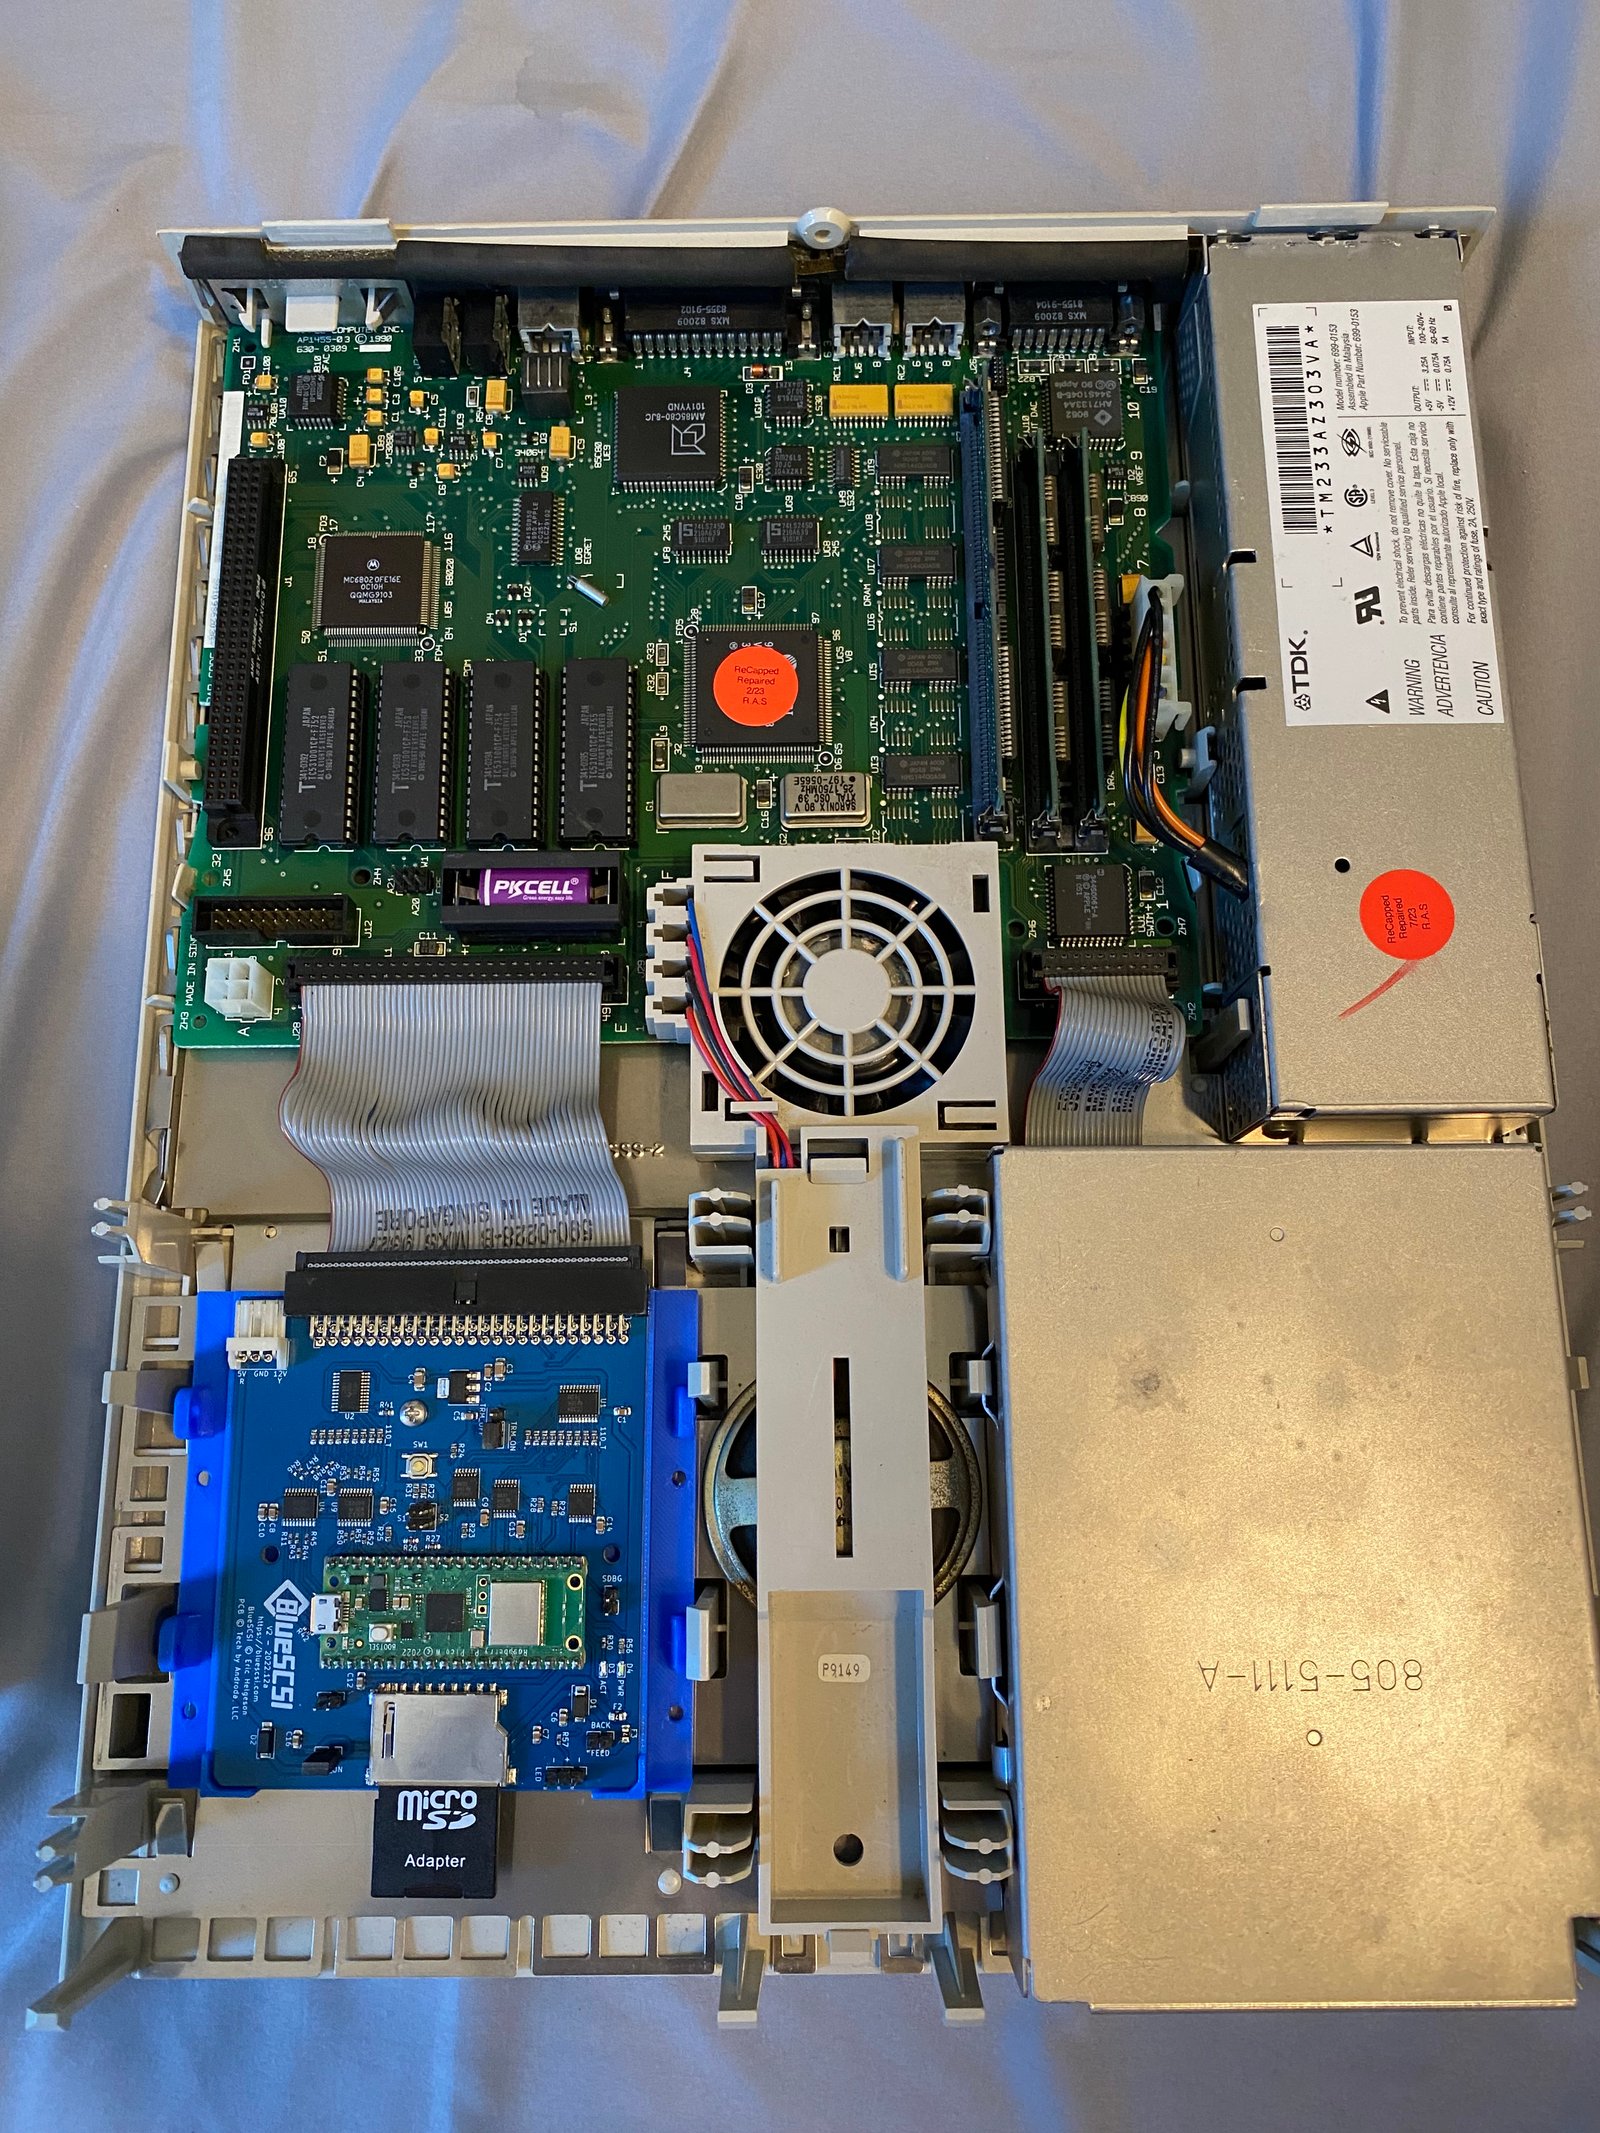
The pic I sent to Wayne after Lucy arrived. So clean for something that’s over 30 years old! You can see the BlueSCSI at the bottom left with the SD card it uses to replace the internal hard disk. I’ve put the PRAM battery back in its place, and those orange stickers show the date when Wayne serviced the main motherboard and the power supply (top right) – pro touch.
The monitor was a bit more concerning, and out came the tools to get it apart and see if it was something serious. Disassembly was pretty straightforward, and I found that one of the speakers had broken off (likely during transit) and looked to be an easy fix. It also let me get the insides cleaned out since it was quite dusty. After a day of letting the glue dry and a good cleaning I pieced the system together. I was hoping the Wombat would arrive by then, but no such luck. I connected the monitor to the LC and the video adaptor Wayne provided, connected them both to power, crossed my fingers, and turned everything on. I did as Wayne suggested and left the ‘hood’ off during the first powerup:
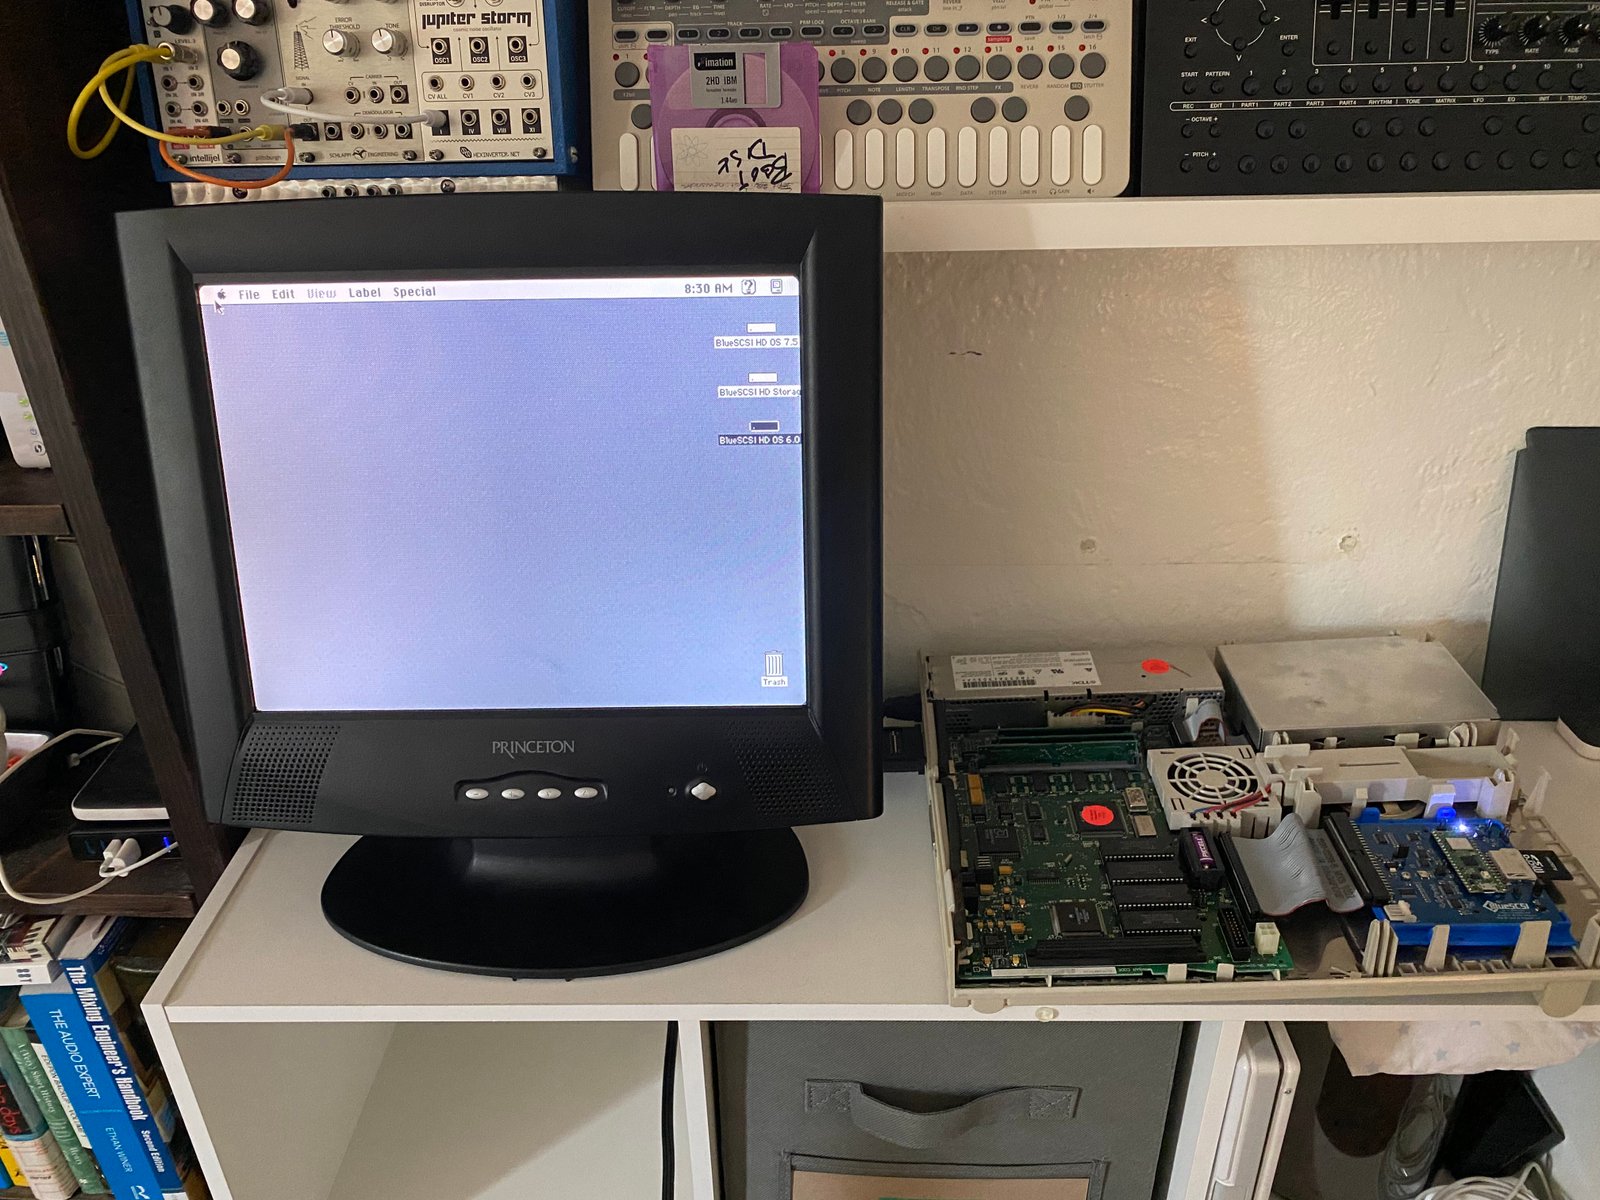
Lucy lives!
I had to get into the on-screen menu of the Princeton since the display was pretty wonky looking, but selecting its ‘Auto Scan’ function made everything perfect. I took the pic above and emailed it to Wayne to show everything was fine. He had created multiple ‘drives’ on the SD Cards in the BlueSCSI – a System 6 one, a System 7.5 one, and a ‘Storage’ drive full of apps and utilities. It’s booted into System 7.5.3 in the above pic. The Wombat arrived the day after I took this and it works like a charm! More on usability in a bit…
But first I need to talk about the ‘techie side’ of making this work, so buckle up…
The BlueSCSI does make things better as far as dealing with ‘SCSI Voodoo’ since we can remove the SD Card to transfer data back and forth to another Mac with an SD Card Reader. But there’s a catch – this Mac used Apple’s HFS (Hierarchal Filing System) for formatting drives which has been long since abandoned by The Mothership®. A current Mac can see and read info from the SD Card, but the LC (or any other HFS machine) will not be happy if you just dump a bunch of data onto it from a newer machine, so installing a period-correct OS using Apple’s images or floppies just won’t work. To top it off, the older floppies used in the early Mac were variable-speed – so using a USB Floppy Drive won’t do you any good unless you invest in some serious hardware.
But the good news is you can get a Translator.
There are quite a few Emulation Apps out there, but I used Basilisk II since I’ve played with it before and it has great tips for working with the BlueSCSI. Although I’ve read that Mini vMac works better with 68k machines (it will boot System 6 and earlier while Basilisk will not) I didn’t have any issues moving things back and forth between the LC and Benson (my Mac Studio). What helped me was Wayne had already installed systems on the BlueSCSI SD card. I’ll link to lots of into if you are just starting from ‘square one’ but you still have to know the ‘trickery’ required to correctly move information back-and-forth.
Simply put, once you get your ‘translator (Basilisk in my case) up and running on your current Mac (it does Windows as well if you need it), you load the images on the SD card (what BlueSCSI defines as a .hda file), assign that into your Basilisk startup (after changing the images’ file extension to ‘.dsk’) and then when it’s mounted you can load in the System, utilities, and applications you want. You can then test that image to make sure it’s bootable and has what you need, quite Basilisk, rename your image back to an ‘.hda’, pop out the card and put it back into the BlueSCSI to reinstall into your older system. It’s easy once you do it a few times, but there are videos that make this process more understandable than the simplistic explanation I’ve given here.
So… with the ‘dirty work’ out of the way I could now move forward with what I really wanted to do – get Master Tracks Pro up and running.
In my post earlier this month I showed a picture of the MTP 5 disk I had kept for nostalgia reasons. Now that I had a computer with a working disk drive would it still work? Could I actually install from it after all these years?
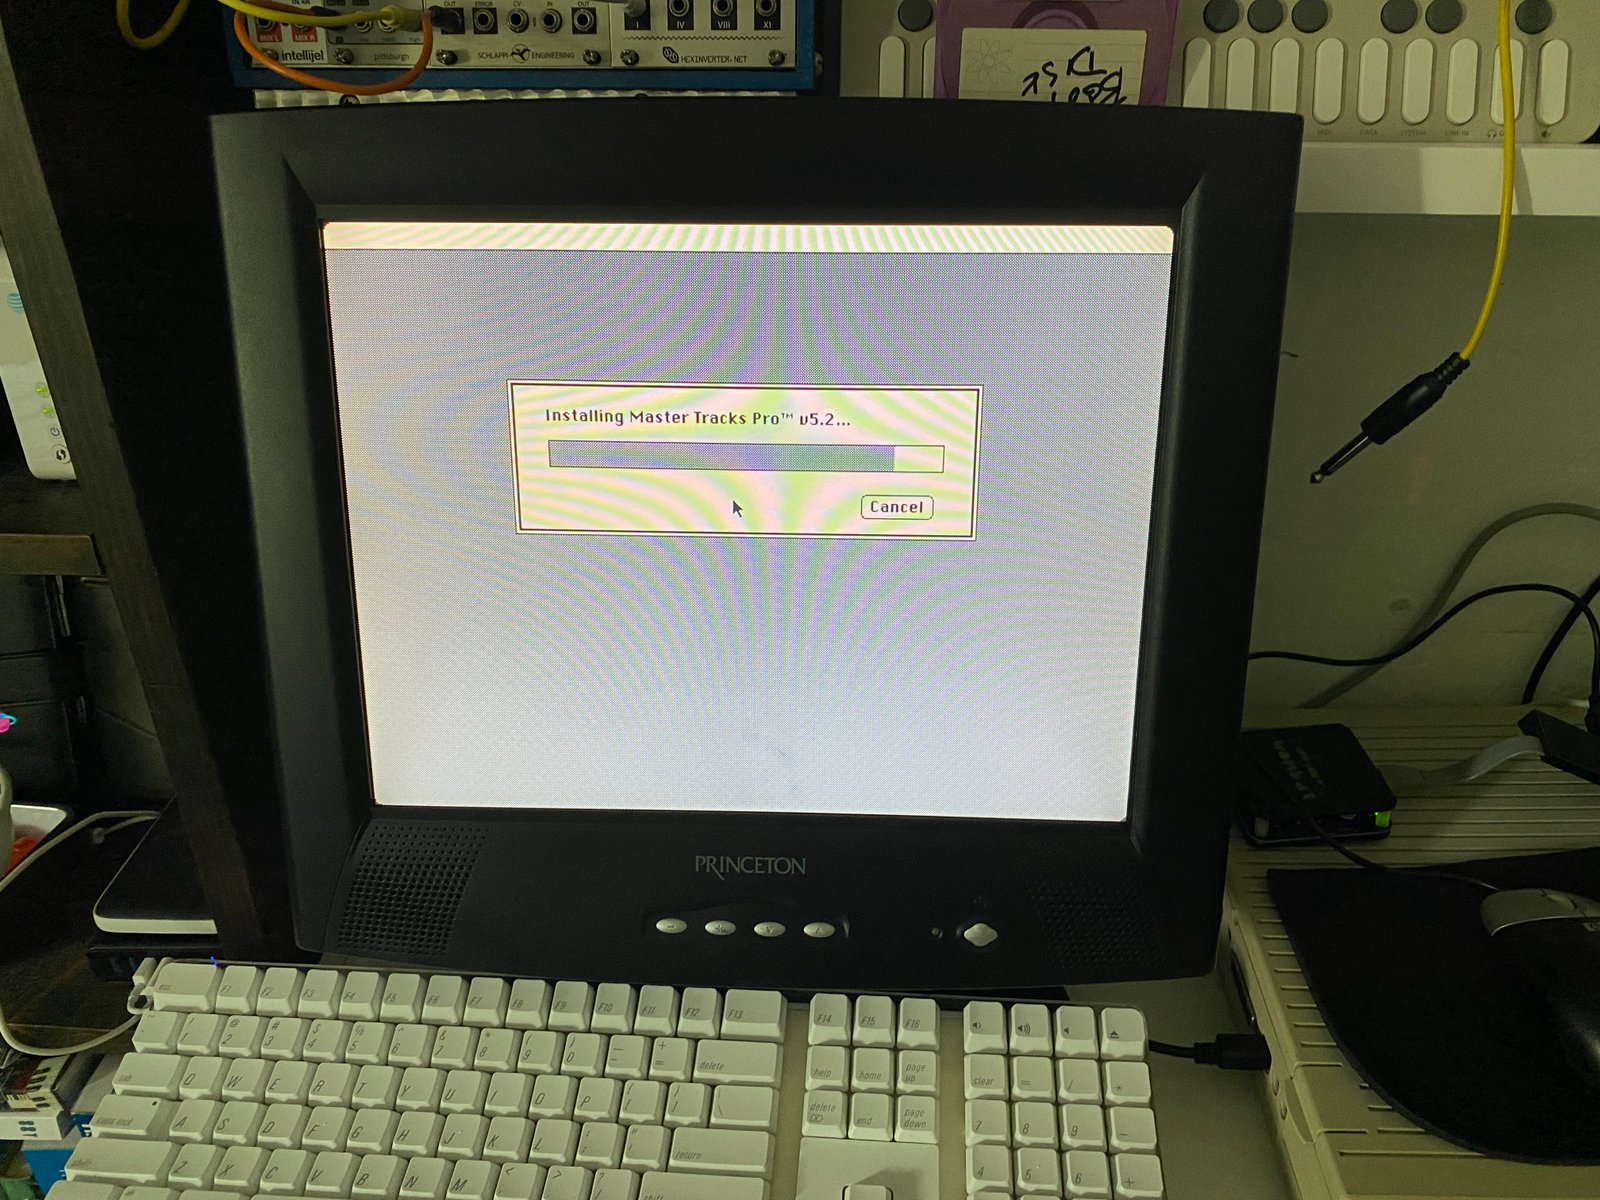
Yeah, the picture gives it away.
All those stories we heard and read that floppies will erase themselves at the slightest magnetic wind wafting their way are complete BS. This floppy has been moved from box to box, storage bins and containers, and multiple houses and offices here in the neo-tropical south. And yet, close to 30 years later, it still loads, runs, and will happily install its contents.
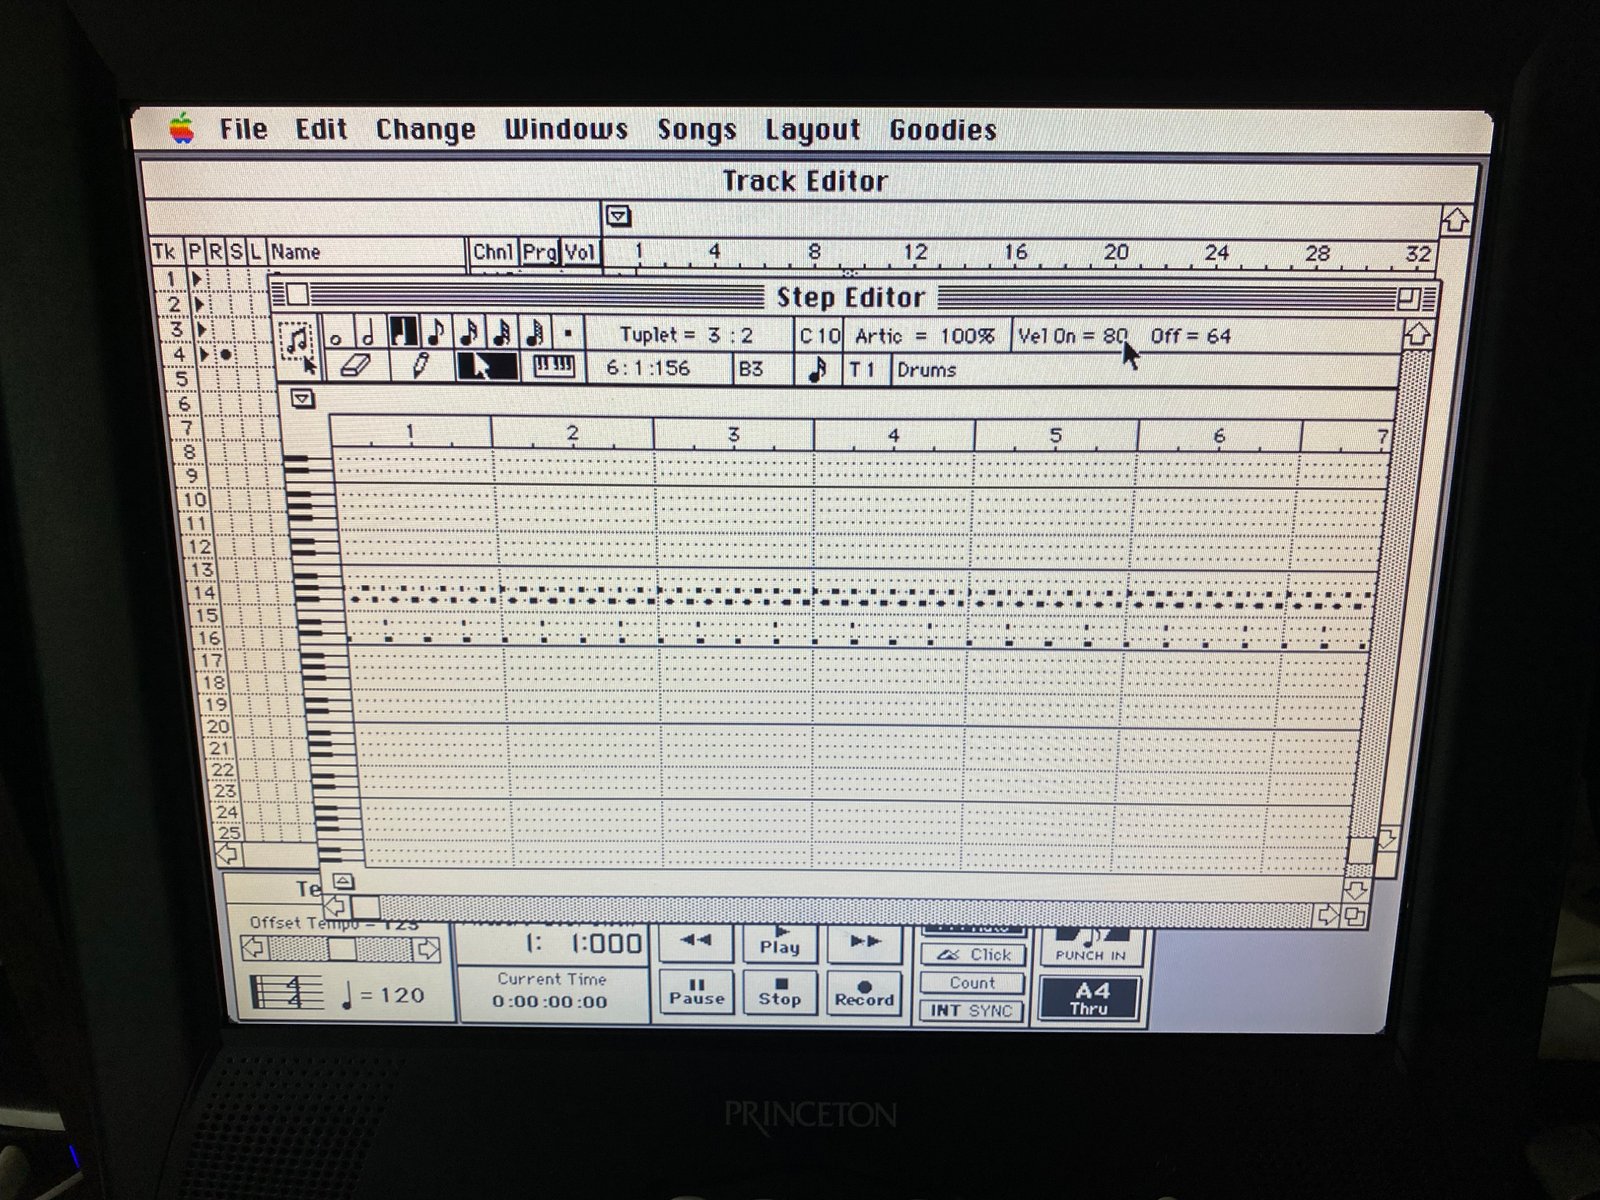
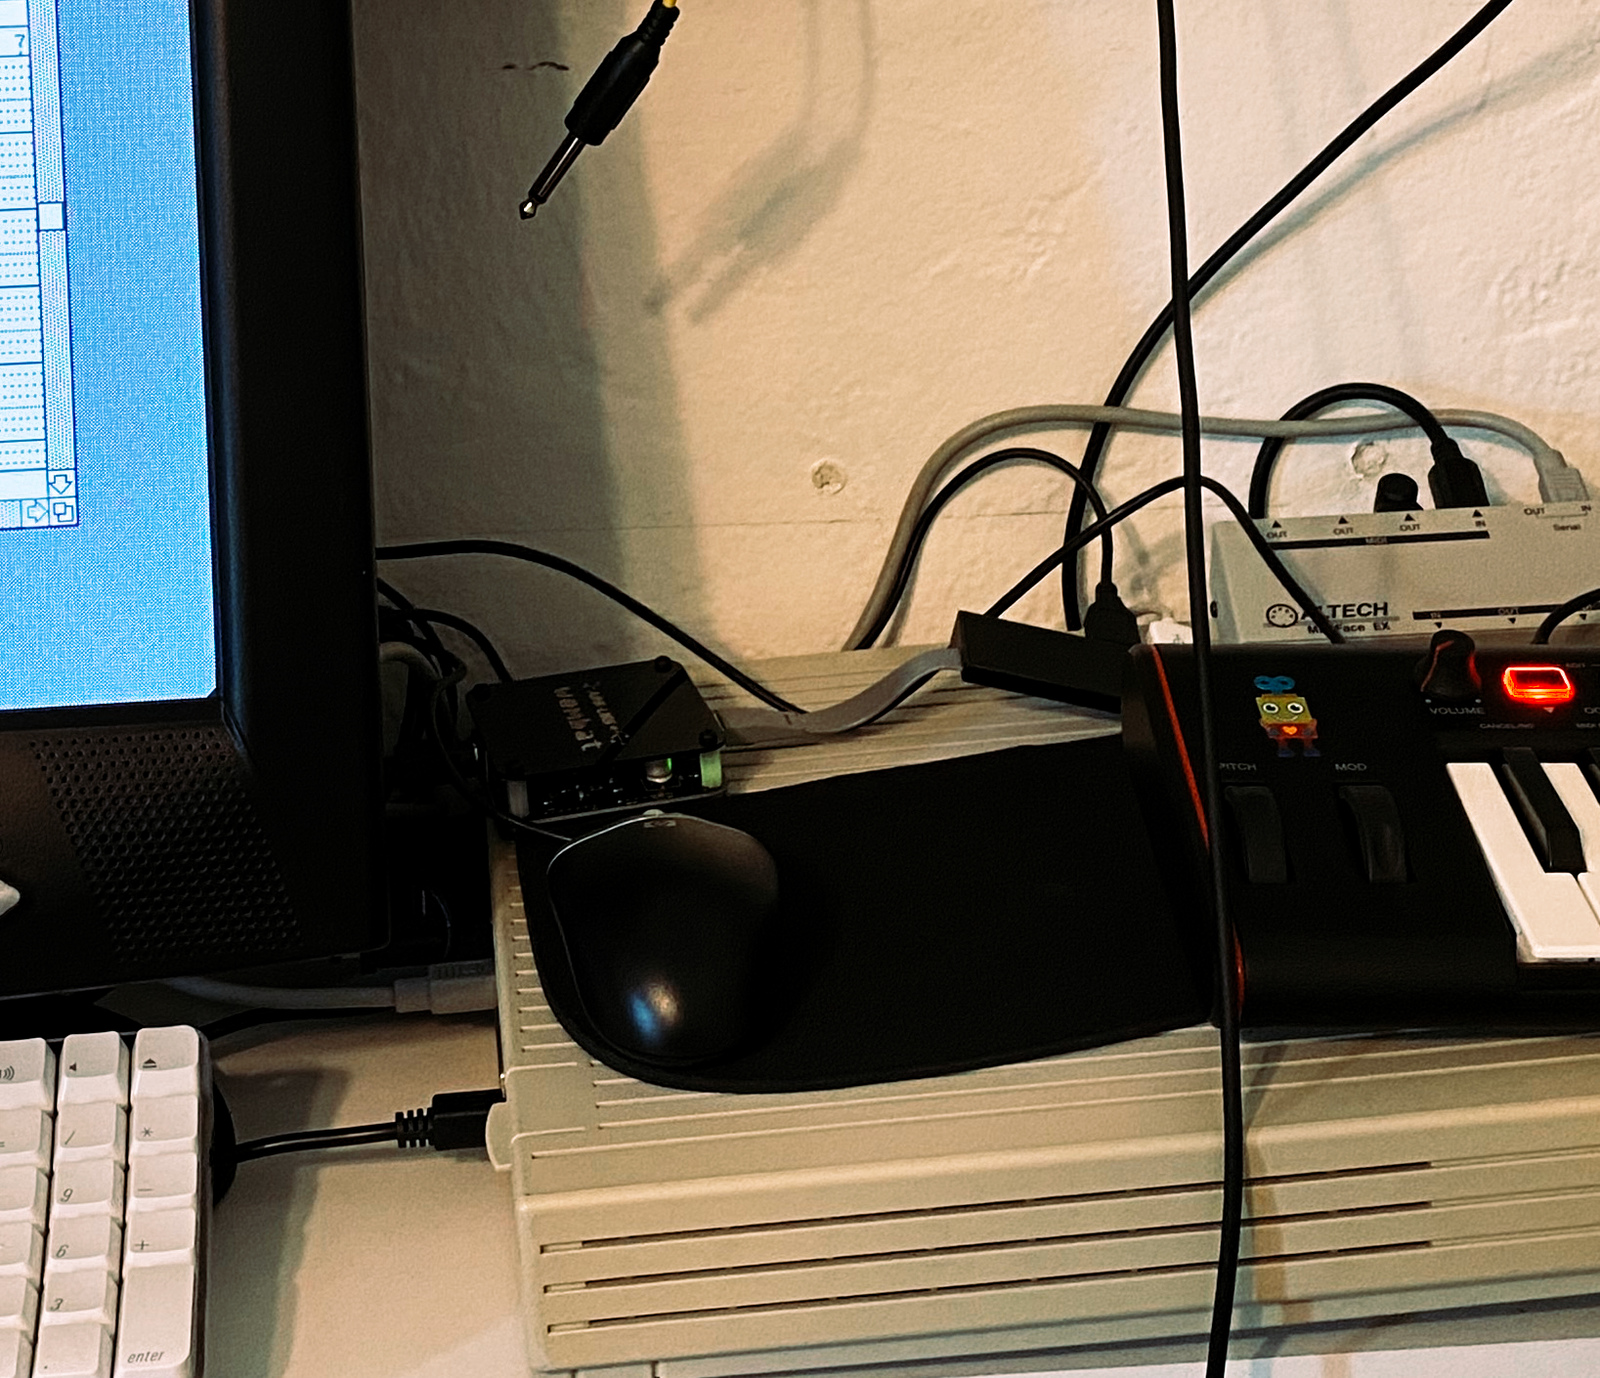
Within minutes of installation I had it connected to a MIDI Controller Keyboard and sound module and recorded 4 tracks of an insipid techno track. It’s still easy to understand, has plenty of capability to modify your parts via MIDI Controls, and the timing is still as rock-solid as I remember. And in the past few days I’ve really enjoyed using it for writing music and developing ideas. Like MaG3, it boots fast with no constant nagging for updates or any other annoying messages that interrupt the creative flow.
So a complete success for the end on #Marchintosh 2024 I would say – MaG3 got some much-needed love, and I have a fantastic 68k machine. But I still have one more thing I was to try here… Remember that we’re just dealing with MIDI Data. There are no VST’s, or Virtual Instruments, or Audio recording or editing on these machines – all of that has to be done with external hardware, and that means more space and more things that have to be set up (like selecting sound and loading samples) before you can start working on a session.
So I want to know if I can use Lucy as a sequencing machine connected to another Mac (likely Oscar, my Mac Pro Trashintosh) and control the instruments, effects, and recording capabilities hosted in that. This would eliminate the vast number of MIDI keyboards, synths, samplers, and drum machines (not to mention mixer(s) and processing effects) needed to make a track – replacing them with just another computer, keyboard, mouse, and monitor. This could be done via MIDI (I’ve done this kind of silly thing before with two different computers), but I’m wondering if a network of some kind (like ethernet or Dante) would be more efficient.
That above thought makes my brain hurt just thinking about all of the ramifications involved in making it even a plausible possibility…
So for now I’m going to enjoy the fun of being a youngster again exploring the limitations of the early days of MIDI Music Production. It’s not going to replace Logic Pro, or Reaper, or Studio One for the things I do, but it really is nice to go ‘yeah – I’m going to make something with just two instruments and see what happens’ kind of vibe just to get out of the mess of modern computing.
Until next time…
Leave a Reply